Laminate floors give the look of hardwood, tile or stone flooring without the hassle and expense associated with traditional installation processes. Find out how to lay laminate like an expert and avoid common errors.
Before beginning, measure the area carefully. Be sure to account for doorways or transitions between flooring materials as well as leaving an expansion gap of 3/8-inches between each wall and the first row of planks – this allows room for expansion!
Preparation
Before installing laminate flooring, there are a few preparations you must make in order to ensure an effortless installation experience. These preparations can help ensure smooth installation without hassles or issues.
Before installing any flooring, the first step should be ensuring that your floor in the room where you intend to place it is clean and level. This may require taking steps such as taking up carpeting or any existing adhesive residue on the surface that could obstruct progress.
As soon as the wall where laminate will be installed is structurally sound, you must ensure it will accept it properly; laminate isn’t compatible with walls damaged by moisture or mold damage.
Consider installing a vapor barrier on your subfloor as well, to prevent moisture from seeping into the fiberboard of your new laminate flooring and potentially leading to warping over time.
Underlayment
Laminate floors require underlayment to aid with their stability and protect them from denting, while covering any minor imperfections in the subfloor that could cause planks to catch on them and cause further damage to their surface.
Underlayment options such as foam, cork, rubber and felt can provide unique advantages in different flooring applications. Each material comes with specific advantages designed for specific requirements.
An effective underlayment should help your floors maintain an ideal temperature, prevent dents from developing and provide sound dampening properties, among other advantages. Some underlays also double up as moisture barriers to help protect them against water damage.
Some laminate floors come equipped with pre-installed underlays, making installation simpler. Otherwise, purchase underlayment separately and install one strip at a time starting with the longest wall. Once in place, follow manufacturer’s instructions for butting edges and sealing seams to complete installation.
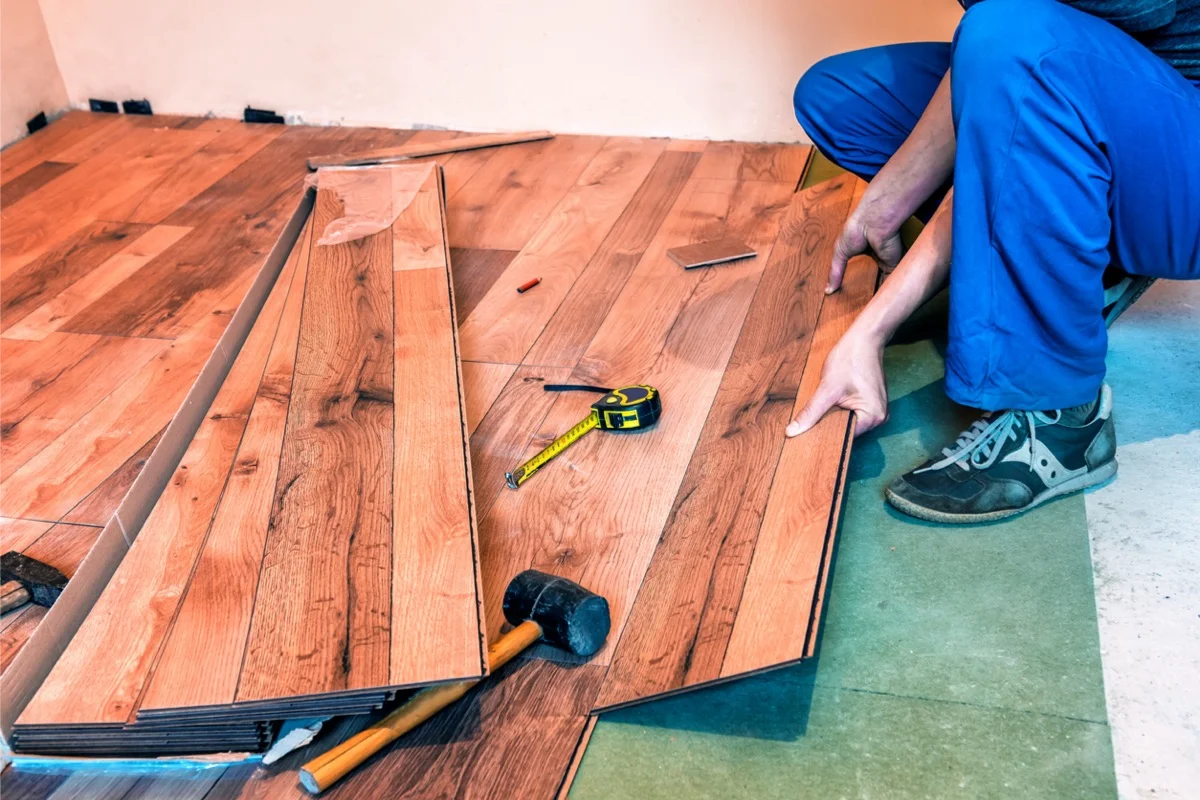
Installing the Planks
Laminate flooring has long been a top choice for many home projects due to its affordability, durability, and installation ease.
Step one in installing laminate is measuring the area where you wish to place it; this will help determine how many rows of planks will be required.
Start laying out the floor boards along the longest wall in the room to ensure they will fit securely and look professional. This is the easiest and best way to guarantee they look right and remain within budget.
Next, use spacers to maintain an even gap between the floor and walls for maximum adaptation to temperature and humidity levels in your room. This will allow the laminate flooring to better adjust to changes in both temperatures and humidity.
Once your flooring has been installed, stagger the end joints so that the seams are offset for a more natural appearance and to prevent close seams from buckling. This will also keep close seams from buckling.
Finishing
Laminate flooring is an economical and hardwearing choice that stands up well under high foot traffic areas and scratches – key considerations when selecting flooring types.
For cutting laminate planks with precision and no risk of splintering edges, the ideal tools are a table saw or circular saw with fine-tooth blade. Both tools will produce clean cuts while simultaneously minimizing any likelihood of splintering on cut edges.
Once the first row of laminate planks are installed, use a hammer and tapping block to close up each plank’s tongue-and-groove joints. Be careful to avoid hitting directly against any plank edges as this could crush it and render subsequent installations impossible.
Start the second row where the first ended and stagger its seams at least 12 inches apart, cutting planks to size while leaving an endpiece that you can use to begin each new row – this allows for continuity throughout your room.